• journal
Summer-Supper-1.jpg

Supper by the St. Johns

August 02, 2014 by lean timms in Food

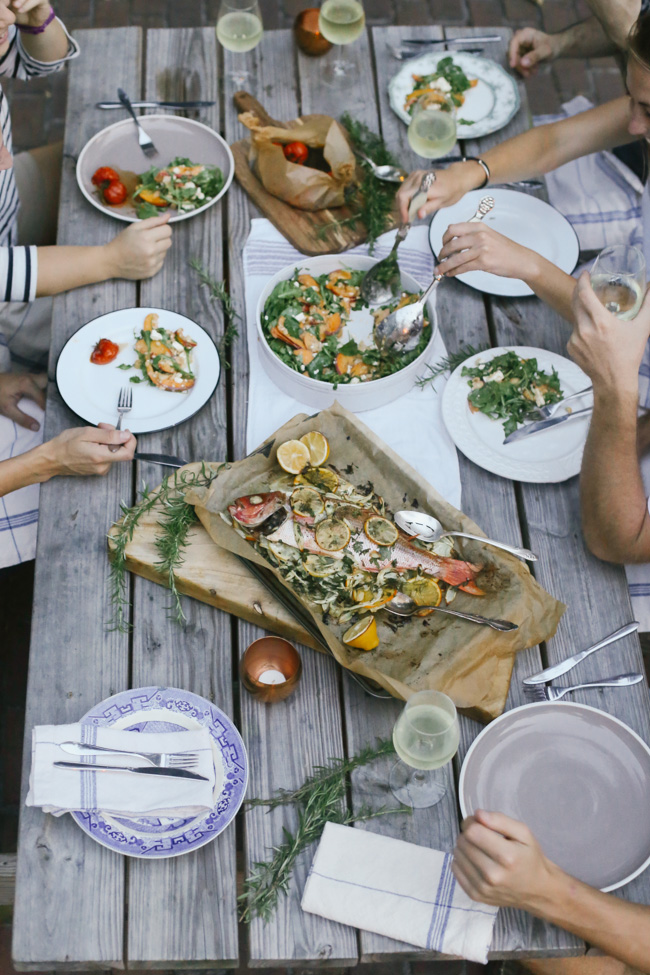
The summer in Florida is relentless. It's part of the reason that I love it here so much. You can step outside in the middle of the night and become covered in sweat by just standing still. The air is thick. The sun is constant. The rain storms are daily and beautiful. The river here in Jacksonville provides a nice buffer for the heat when the days of sitting in the swelter are just too much. Like a forgiving friend, the St. Johns river whips up an evening breeze like no other. And when you can dine with friends outside by that river and in that breeze, eating local fish and drinking cold wine, well, this summer is welcome to last as long as it likes.

Summer-Supper-9.jpg
Summer-Supper-3.jpg

The plan was to dine on the dock. But that breeze that I spoke of, became wind. So we stayed close to the house and we compromised.

Summer-Supper-10.jpg

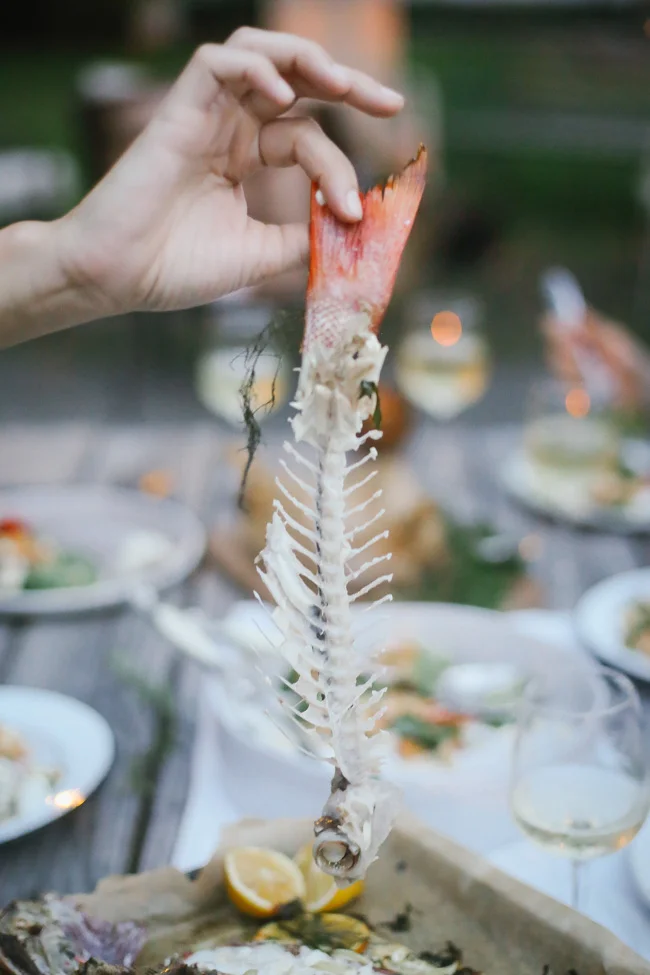
There is a little fish shop not to far from where I live that I only discovered a short time ago called Swimming Yesterday. Oh, that name! I went in for the first time last week to get some mussels and shrimp for dinner. I watched as the person before me ordered some fresh snapper fillets. The fishmonger took a whole snapper out of the cold cabinet and began to scale and fillet the fish right there on a bench in front of us. It took me back to times where I would venture out with my dad and brother to go fishing on the holidays at Caloundra, on the East Coast of Australia. I used to be fascinated as I watched my dad scaling and cleaning the fish after a day out on the water. Come to think of it, gutting and cleaning the fish was one of my favourite parts. This isn't logical for an overly empathetic person such as myself. But I guess neither is being a vegaquarian (yes that is now a word) and accepting the idea of eating fish but not land animals... but let's not confuse ourselves any more than is needed. I'll leave that discussion for another time...

Being in the store and watching the fishmonger prepare the fish took me back to old times. I realised that seeing a fish being prepared like this was a treat and an almost forgotten part of the entire fish eating process. It's so easy to purchase an already frozen piece of filleted fish from the store for dinner. But seeing the whole preparation process in front of me and enjoying the waiting and watching in line made me really appreciate that fish and that little fish store.

I went back to the store, this time to get myself some snapper as well. However, I decided to keep it whole. I wanted to bake it as it was. The fishmonger was a lovely gent. He happily scaled it for me, put it on ice and told me that it was a Vermilion Snapper, caught local only 30 miles off shore. That made me very happy. It also made my tummy grumble and my mind begin to work overtime - a summer feast was being plotted.

Summer-Supper-12.jpg

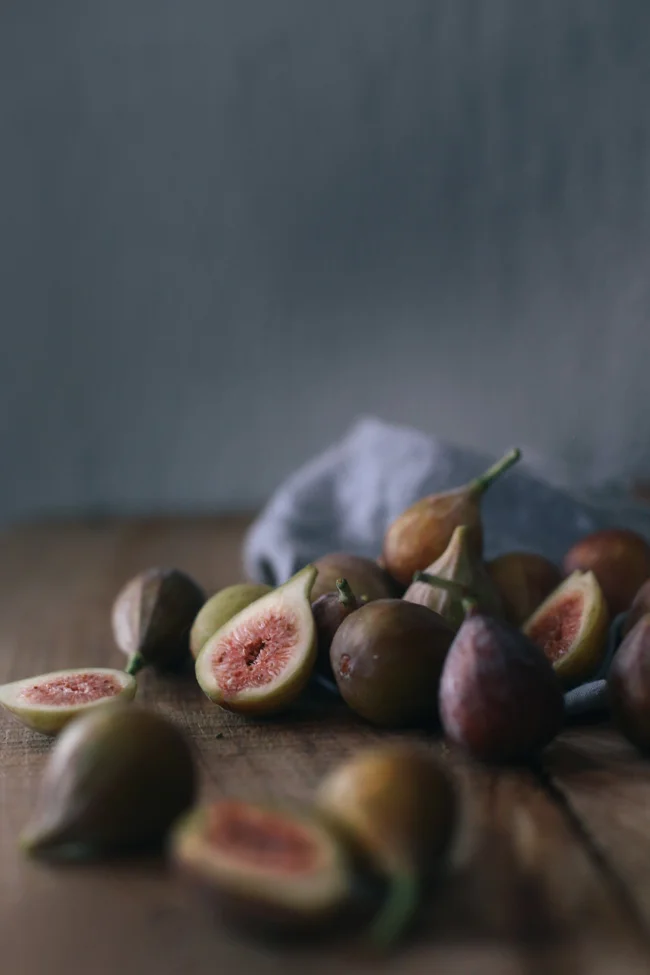
Did I mention how excited I was about the locality of the snapper from the fish shop? Well, it is also peach time in the South. Recipes for peach pies and cobblers are everywhere. It makes sense. They are in season, delicious and local. The ones that I picked up from the farmers market came from Georgia - which for me, is just over the border.  And nothing is better than knowing that a good part of dinner came from just a short distance away. Sustainable, fresh, local food. Another reason to be excited about the planning of this scrumptious summer, riverside supper.

Summer-Supper-14.jpg
Summer-Supper-5.jpg
Summer-Supper-15.jpg

We also needed a dessert. I have fond memories of my time in the UK learning about Eton College, visiting it's grounds and eating it's well known dessert - traditionally served at the Colleges annual Cricket game against their nearby rival school, Harrow's College. Most commonly, it is broken meringue served with fresh strawberries and cream. It is the ultimate English summer time treat. Although there are some varieties of strawberries still to be found around this time of the year, the fruit that has really overtaken the market stands at the moment are cherries. I found both Dark Hudson and Rainier types, so I decided to substitute their mix for the strawberries, adding pistachios and drizzled caramel toffee for added crunch. The flavour combo, although saying this myself, was really, really good.

Summer-Supper-16.jpg
Edited.jpg

As it turns out, I am taking quite a longtime sought after trip up north this week. A friend and I are headed to Brooklyn, NY to get our exploring on for a full 14 days. It's adventure time in the big apple. I. Can't. Wait. So, I guess an up side is that although I said I didn't mind it, I am looking forward to taking a break from this humidity. I am also looking forward to time to scout out some belly pleasing eateries, some craftsman stores, roof top cinemas, days watching friends surf at New York beaches, digging around through boroughs, downtown, uptown, east-side and any-which sides and general Brooklyn & NYC frolicsomeness. I promise you many instagram posts. In fact I am genuinely worried about the immediate future of my feed. It is going to become overridden.

The downside however, is that for the next two weeks, this is the only food post that will frequent the pages of my journal. So, I've made it a good one for you. I've brought you 4 new summer recipes to keep you happy and cooking until I return from the Hudson back to the St. Johns.

Summer-Supper-8.jpg
Summer-Supper-7.jpg
Summer-Supper-6.jpg

Here are the recipes. Happy Summer.

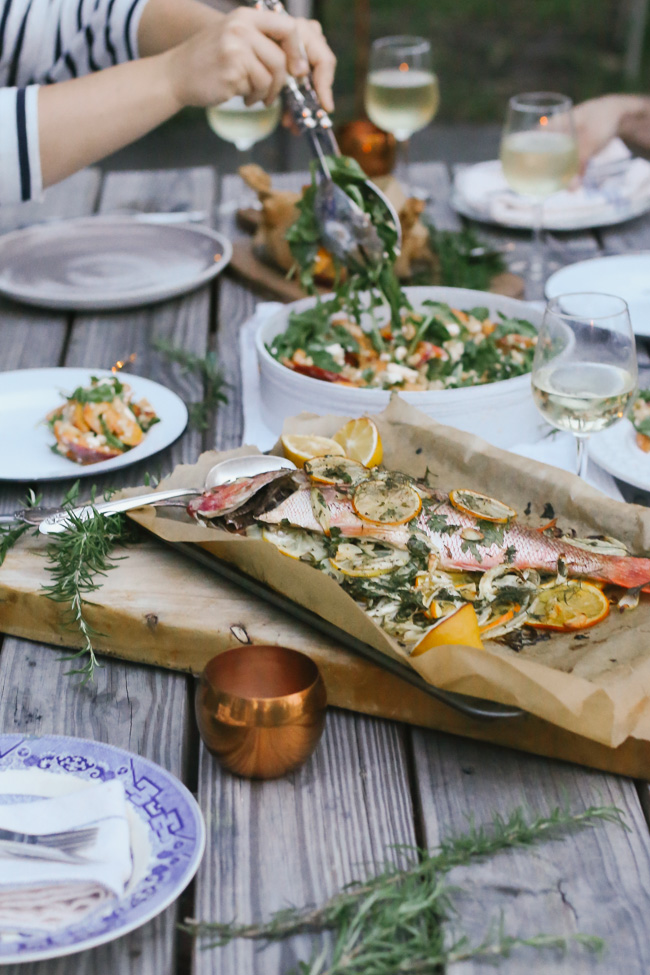
Baked Snapper with Fennel, Orange + Parsley

prep time: 10 minutes
cook time: 30 minutes 
total time: 40 minutes

yields: 4 servings

One whole cleaned and scaled 1.5 kg /approx 3 pound snapper
One large fennel bulb + fronds
2 Oranges
1 lemon
1 large bunch flat leaf parsley chopped
4 cloves garlic peeled and sliced
6 tbs good quality extra virgin olive oil
salt and fresh cracked pepper

Preheat oven to 220°C /425°F. Remove fronds from fennel. Finely slice the whole fennel. Slice oranges and half the lemon. Combine fennel, garlic, oranges, parsley, 4 tbs oil, salt and pepper in a large bowl and toss to coat. On a baking tray lined with baking paper, spread 2/3 of the fennel and orange mixture along with the fennel fronds over the middle of the tray, big enough to lay the fish over. Stuff the fish cavity with as much of the fennel orange mixture that will fit. Lay the fish on the baking tray and sprinkle the rest of the fennel mixture and the lemon slices over the top. Give the fish a final drizzle with remainder of the oil and extra salt and pepper to taste.  Place the other half of the lemon (should still be whole) on the tray as well. Bake in oven for 30 minutes or until the flesh of the fish easily comes away from the bone. Serve as is in the middle of the table with a good squeeze of the baked lemon half. 

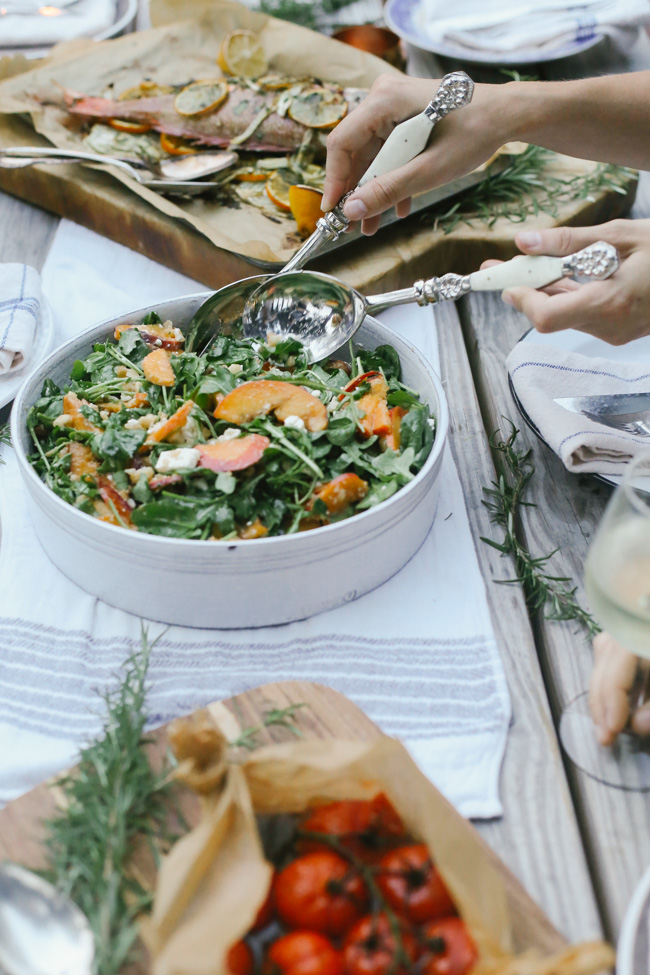
Peach, Feta + Macadamia Salad

prep time: 10 minutes
yields: 4 side servings

4 Fresh ripe peaches
225g / 1/2 pound firm feta, diced
500g roasted macadamia nuts, chopped
Approx 140 - 150g / 5 ounces baby rocket/arugula
Approx 70-80g baby / 2.5 ounces baby spinach

For the Dressing

1/3 cup olive oil
1/3 cup red wine vinegar
2 tbs maple syrup
salt to taste

To slice the peaches, cut into the seed around the entire peach. Twist the two halves so that one half comes away from the seed. Using a blunt knife, remove the seed from the other half. Slice peaches length ways into medium/fine slices. In a large salad bowl, combine spinach, rocket/arugula, macadamia nuts, peaches and feta in a bowl. If you don't intend to serve the salad right away, keep peaches covered in a bowl of cold water to prevent them from browning, and toss in with dressing when ready to serve.

For the dressing, place oil, vinegar, maple syrup and a pinch of salt into a small well sealed container. Shake to combine. You can also whisk if you don't have a container. Pour over salad when ready to serve and toss to combine.

Roasted Balsamic Tomatoes

prep time: 5 minutes
cook time: 25 minutes 
total time: 30 minutes

yields: 4 servings

8 small tomatoes on the vine
2tbs extra virgin olive oil
2 tbs balsamic vinegar
salt + fresh cracked pepper

Preheat oven to  220 °C / 425°F. Line a baking tray with baking paper. Place tomatoes on paper keeping vines attached. Fold the paper to make a little 'boat' around the tomatoes - twisting the ends up at both ends. Pour over oil, balsamic vinegar and sprinkle with salt and pepper. Bake in oven for 20-25 minutes. Tomatoes should be partially split and oil/vinegar should begin to caramelize. 

Cherry Pistachio + Caramel Eaton Mess

It's English, so I decided it had to be in Metric. Do yourself a favour and purchase some good scales. I promise, you will never look back...

prep time: 15 minutes
cook time: 1 hour
total time: 1 hour 15 minutes

yields: 8 servings

5 egg whites
300g caster sugar
500g fresh cherries (I used Dark Hudson and Rainier types)
75g crushed pistachios
220ml / 1 cup heavy whipping cream100ml water

Preheat oven to 150 °C / 300 °F. Line a large baking tray with baking paper. To make the meringue - In a large, clean bowl whisk egg whites on medium speed until semi firm peaks form on top. Gradually add 200g of sugar. Mix on high speed for 6-8 minutes or until the egg whites are glossy and all of the sugar granules have dissolved. Pour over baking tray so that it is approx 5cm / 2 inches high. Bake in oven for 1 hour. The meringue should be a light brown colour all over and be cooked but still soft in the center. Remove the meringue to cool. Don't worry if it cracks, we are going to crack it anyway - we are making eton mess!

Whip the cream until stiff peaks are about to form. Remove the seeds from the cherries by slicing around the seed, twisting to remove one side then remove seed on other side with fingers. Hello purple hands!

In a small saucepan, combine remaining caster sugar (100g) with 100ml water. Heat over high heat until boiling, then continue to reduce until the mixture turns a caramel/toffee colour.

While your caramel is reducing - On a serving platter, crumble the meringue and roughly arrange in pieces to form a round base. Generously coat the meringue with cream, cherries and pistachios.

Using a wooden spoon, drizzle the caramel toffee over the top of the Eton Mess. And you are done!

August 02, 2014 /lean timms
Food
Comment
Fig-and-Orange-Blossom-Crostata.jpg

Fresh Fig and Orange Blossom Crostata

July 26, 2014 by lean timms in Food

Nothing beats friends. Especially friends who have friends who have a fig tree.

Fig-and-Orange-Blossom-Crostata-3.jpg
Fig-and-Orange-Blossom-Crostata-4.jpg

I spent my Tuesday noon travelling to a part of Jacksonville that I hadn't been to before. My mission was to to go and pick fresh figs. I am a sucker for foraging for pickable produce and when I heard that a new friend of mine had a friend who had a bearing tree, it wasn't long before I landed myself in a strangers yard to pick the remainder of her lovely, ripe fruit.  I arrived feeling awkward -  I hate asking for favours, especially from strangers - but before long I had a basket filled with newly picked fruit, an entire other bag full of previously picked fruit (it was a generous year for the fig tree) and most importantly, this stranger was no longer that, I had made a new fig friend.

Fig-and-Orange-Blossom-Crostata-5.jpg
Fig-and-Orange-Blossom-Crostata-12.jpg

The previous weekend, my friends and I had put together a Middle Eastern feast at my house. I had been dreaming of dishes from the pages of Jerusalem (it's no secret that I am a colossal Ottolenghi fan). I had tabouleh, felafel, pomegranate and rice pudding on the brain. And figs. All I wanted were fresh figs. The season is so short you see, and who knows when they will pop up in the supermarket and how fresh they will be. We got by with a punnet of black mission figs and delicious as they were, the fresh figs that were to follow very quickly took the cake. Or Crostata as it turned out. Although much smaller in size - often a natural home grown back yard reality - they were still delicious and even more so, knowing that they had come from a happy, autonomous place. So with Middle Eastern flavours still flowing through my mind, I decided to pair them with one of my favourites - orange blossom water.

Fig-and-Orange-Blossom-Crostata-121.jpg
Fig-and-Orange-Blossom-Crostataa_.jpg
Fig-and-Orange-Blossom-Crostataa.jpg

While trying to decide on the recipe for this post, I was chatting to one of my best friends from back home.  I had been missing her dearly and at the time of our chat, she was one day overdue to have her second baby. We were throwing up ideas for the figs. Jam became a favourite, but eventually after a quick lesson on free form tarts, the idea of a crostata came about. A tart so easy to manipulate with seasonal fresh fruit without compromising the fruits shape and flavour. It took me a day to get my hands dirty in the kitchen, and as it turns out, as I was knee deep in making the whole wheat flour and olive oil crust, my dear friend was knee deep in, well, labour. So - as tribute to new fig friends, old best friends, and brand new babies, this crostata and those freshly picked figs have become the ultimate analogy for my current feelings towards both little baby Thomas and in general, good friends - fresh, generous, full of goodness and deliciously good for your heart. Oh dear. I've gone all mushy. But that's what best friends who have brand new babies will momentarily do to you. 

Fig-and-Orange-Blossom-Crostataa_-2.jpg
Fig-and-Orange-Blossom-Crostataa_-3.jpg
Fig-and-Orange-Blossom-Crostataa-2.jpg

Fresh Fig and Orange Blossom Crostata

For the Crust

prep time: 25 minutes
cook time: 35 minutes 
total time: 1 hour

yields: 6 servings

250 grams / 2 cups whole wheat flour
1 teaspoon fine sea salt
2 tbs brown sugar
1 free range egg
60ml / 1/4 cup olive oil 
60ml / 1/4 cup) cold water

For the Filling

500g fresh figs
125g 1/2 cup packed brown sugar
40g butter
1tsp orange blossom water

Preheat the oven to 200° (400°F)

Begin by making the crust. Combine the flour, salt and sugar in a medium bowl. Lightly whisk the egg and add it, the oil and the water to to dry ingredients. Mix (I use my hands, but a spoon could work too) until all of the ingredients come together. Feel free to add more flour or water if needed. Turn the dough out onto a floured work surface and lightly need to ensure the mixture is combined. Using a rolling pin, roll the dough into a rough circle approximatley 40cm/60inch in diameter and 3/4cm thick. Transfer the dough to a baking tray lined with grease-proof/parchment paper.

Chop the fresh figs into small pieces – for larger figs, quarter, for smaller figs, halve.Place the sugar and water into a medium saucepan on medium high heat until the sugar has dissolved and the mixture has turned to a nice caramel colour. Add the butter and turn the heat down to a simmer. Allow the caramel too cook for around 5 minutes. Add the figs and toss gently to coat in the caramel. Cook for a further 5 minutes or until the caramel begins to thicken.

Spoon the figs into the center of the dough. Keep the majority of the caramel in the pan – you will want to trickle this over once you have folded the dough over the fruit. Roughly trim the edges of the dough to form an circle with a gap of around 8-10cm (3-4 inches) between the fruit and the edge of the dough. Fold the dough over by creasing/pleating to form a rim. Pour over the remainder caramel (keep it inside the rim) and sprinkle the dough with some extra sugar. Bake the crostata in the oven for 20-25 minutes. Serve warm with fresh cream or ice cream. Yum.

July 26, 2014 /lean timms
Food
Comment
Sourdough-7.jpg

The Secrets of Sourdough

July 18, 2014 by lean timms in Food

I have a little piece of England living in my kitchen. Bacteria type of living. Good bacteria, that is. It comes from a bakery in the southwest of the country. Its story is a little vagabond like. This little piece of England escaped its life in Europe by finding its way on a plane and venturing to the north west corner of Florida, with its former adopted owner, Meredith. It bounced through familiar type oven filled environments to finally make its final resting place on my kitchen counter top, right here in Jacksonville. Since its arrival, I have become addicted to feeding it and it has been feeding me. Tea and toast. Lots of tea and toast. I have found myself desperate and very committed to keeping it alive. It has become my pet.  It has been lovingly named Frankel.

Sourdough-6.jpg
Sourdough-4.jpg

You may have already read about the very fine Sunday a couple of months ago, where I found myself taking part in a sourdough workshop at Community Loaves Bakery. We were taught the lessons of sourdough and learnt how to make the perfect loaf. We were introduced to all sorts of techniques and tricks and most importantly, we were introduced to our starter. The special ingredient that makes sourdough, sourdough. This is where I first met Frankel. You see, Frankel is my starter. It turns out that Frankel used to be a part of the starter used in the bakery where Meredith (one half of the lovely ladies at Community Loaves), used to work in England.  I have no idea if smuggling age old starter from country to country is legal, but I do know that I am going to (attempt) to do the same when I go back to Australia. Frankel is going to be one well traveled little guy.

Sourdough-3.jpg

Going into the workshop, I had very little knowledge about how to make sourdough. It had always felt so secretive. Somewhat covert and cultish that only a select few of underground, cloaked folk understood and kept tight and hidden within their baking books. I knew it was a pretty special process and I knew that I would love it. When I was sent home with a small jar of starter with the words 'feed me' written on paper attached to the top, along with a notepad full of instructions and lessons learnt from the day, I felt special. The secret was with me. This little jar of goodness was one more positive step into the wondrous baking world.  Now, I  spend every other day feeding this goodness, my Frankel, making sure he has enough to eat, so that on days when it is raining or days when I feel like getting my hands dirty in the kitchen, I can use him to make a loaf of Sourdough, or two. I am utterly, slightly obsessively hooked.

I have been practicing. Over the last week, all of the little cracks and corners of my kitchen have been coated with flour. My freezer is now well stocked with a hearty supply of bread*, and now I feel confident to go ahead and share the secrets of sourdough, with you.

It's going to be a long post - so if you're not so much into making bread, I'll forgive you if you just look at the pretty pictures and then leave. But if you are staying - please know that I am going to do my best to articulate the crazy complicated instructions that are to follow... every little ounce and secret I am grateful to have learnt from the bread wunderkinds, Sarah + Meredith.

Here we go!

*some that I'm proud of, some that I'm not so proud of

Sourdough-1.jpg

Sourdough Basics Once upon a time, sourdough was the only way to make bread. It is an age old method of using fermented grains to produce bread - it isn't just a flavour. Sourdough has only four ingredients. Water, flour, starter and salt.

Starter

The starter is the yeast used to make sourdough bread. It is made by fermenting grains that feed off the natural yeast and lactobacteria found in the air. Starter is a living, breathing thing, therefore it needs to be kept alive to remain active and useful (see below for how to take care of your starter). Starters also take on micro-bacterial environmental qualities, making them unique to the area that they are produced (hence why Frankel is so worldly and multicultural). To make your own starter, take a look at this recipe from Eyal Schwartz, the head baker of the famous E5 bakery in London. Otherwise, if you live in Jacksonville and know where I am, come and get some from me. Frankel is a generous chap.

Ingredients for Sourdough Bread

To make an 800g loaf of bread you will need:
80g starter
240g whole wheat flour 
160g all purpose flour (organic is best for both flours, if possible)
300g water
8g salt


In addition, you will also need:
Kitchen scales 
Bread basket or loaf pan
Rice flour and corn meal for dusting
Additional whole wheat and all purpose flour for feeding your starter
A peel or small cutting board with a handle
Baking stone (pizza stone, saltillo stone, cast iron or dutch oven will also work)
A razor or sharp serrated knife for slashing

Sourdough-5.jpg
Sourdough-2.jpg

The Timings

Before you start, know that it will take at least 6 1/2 hours to make a loaf of sourdough, including proofing and baking time. Or, if you want to break it up into a two day process, you will need at least 3 1/2 hours on the first day to get your loaf started. However, you don't need to be with the bread the entire time, so it is possible to multi task while baking. It's a great idea to make a couple of loaves at once - the loaves happily freeze if placed in a zip lock or airtight bag. Here are the total times of all of the steps needed to make sourdough (each step will be explained in the next section):

Autolize: 15-20mins

Knead + Add Salt: 3 mins

1st and 2nd Stretch: 2 hours 15 minutes

Scale and 1st Shaping: 20 minutes

Final Shaping + Proofing: 2 hours if leaving at room temperature on the bench, or 30 minutes on the bench then 12 hours in the fridge (this is great to do overnight so that you bake the bread fresh first thing in the morning)

Baking: 45-55 minutes

Sourdough-10.jpg
Sourdough.jpg
Sourdough-11.jpg

The Steps

1st step - Autolize: In a large bowl, combine your starter, both types of flour and water. Using your hands is the best way to make sure the ingredients are evenly combined. Cover the bowl with a tea towel and leave to rest for at least 15 minutes and up to an hour.

2nd step - Salt + Knead: Add the salt to the dough and knead in the bowl for three minutes - folding, pushing, twisting and punching all work great. A handy tip is to keep a bowl of water close by to dip your hands into to prevent them sticking to the dough. Be careful though not to add too much excess water to the mixture - you don't want to unbalance the bread math ratio!

3rd step -  Stretching: Cover the dough and allow to sit on the bench at room temperature for 45 minutes. After 45 minutes has passed, it's time to stretch the dough. Using your hands (dipped in water to prevent sticking), grab an edge of the dough and lift it up, allowing it to stretch. Fold it over itself so that it lays flat ontop of the dough. Turn the bowl a quarter turn and repeat. Do this two more times - four times in total. The stretching helps to encourage the formation of gluten that was initially formed from kneading the dough. Cover the bowl again and leave to rest for another 45 minutes.

After the 45 minutes rest, repeat the stretching step again. Cover and let rest for a further 45 minutes.

4th step - Shaping: For the initial shape, lightly flour a section of your workbench/counter top. Turn the dough out onto the bench so that the smoothest side is facing down. Take one end of the dough and stretch and fold over itself. Take the opposite end and do the same. This is creating tension on the opposite side of the dough which will become the top of the loaf of bread. Turn the dough over so that the top, smooth side is facing up. Here comes the tricky part to explain. You are now going to push the dough to create firm, smooth tension across the top. You may need to move the dough to an area of the bench that isn't as heavily floured so that it can grab the bench as you push it. The aim is to get a smooth tight surface on the top of the dough. Keep tucking the edges under to help with the tension, and keep sliding the dough carefully along the bench to create a round, smooth surface. Be careful not to go too far with the tension, you don't want any areas of the dough to tear. If you do get tears, try to tuck that area of the dough under, and push/slide the dough to reform a smooth surface.  Your dough should end up in a rounded but flattish ball. Remember to use water on your hands to prevent them from sticking to the dough! Once you have a nice smooth and tight surface on the dough, allow it to sit on a floured area of the bench to rest for 20 minutes.

Once the dough has rested for 20 minutes, it's time for the final shaping. Turn the smooth side down onto the bench again. Repeat the same steps as above, starting with the stretching/folding, and ending with the pushing. This time however, you want to shape the dough into the same shape as you intend your final loaf to be depending on the bread basket or loaf pan that you have. The traditional shapes of Sourdough tend to be either oblong, round or baguette. I have an oblong bread basket, but I also like to use a round bowl to change the shape of my loaves up a bit.

If you have a bread basket, generously dust/coat it with rice flour. If you have a loaf pan or bowl, first spray/brush with oil, then generously coat with rice flour. Once your basket or bowl has been coated, gently place your dough, smooth side down, into the basket or bowl. Cover with a tea towel.

5th step - Proofing: You have two choices with proofing. You can allow the bread to proof for 2 hours at room temperature on the bench top if you would like to bake it the same day OR you can place the bread at room temperature on the bench for 3o minutes, then place in the fridge for 12 hours, so that it is ready to bake the next day.

6th step - Baking: Traditionally, sourdough is baked at a very high temperature in a hearth oven that is made or lined with stone to retain the heat. To replicate this at home, you will need a baking stone (I've been using a pizza stone but I've been told that using a saltillo stone bought from home depot/bunnings can also do the trick). The baking stone is important to retain the high heat of the oven which will allow even, consistent baking of the bread. It also helps to pull moisture from the dough to create a lovely, crackly crust - the type that is found on beautiful sourdough loaves.

Preheat your oven and stone to 500 °F / 260 °C for at least half an hour. 

Dust your peel/breadboard with handle with cornflour or corn meal. I also like to throw on a bit of rice flour for good measure - beautiful bread dough sticking to your peel as you go to put it in the oven makes it not so beautiful. Using your fingers, delicately go around the loaf to be sure that it hasn't stuck to the basket or bowl. Turn it out onto your floured peel.

It's time now to slash. This part can be tricky - I'm still yet to master. The idea of slashing or scoring your bread is to control the area of bread that you would most like it to expand during baking. This will create those lovely patterns that you see on top of artisan bread loaves. To slash, you will need either a very sharp finely serrated knife, or a razor blade. The slashing needs to be swift, confident and delicate as not to press down on and deflate the dough. It's a good idea to begin with a simple slash - one straight slash down the middle is a good start. Of course, you can get as creative as you like, the more confident you get.

Here are some tips and instructions that I found from another helpful site - weekendbakery.com (take a peek to see what it's all about):

  • Make swift and confident slashes, but at the same time be gentle (iron hand in velvet glove).
  • Let the knife do the work. Don’t press down on the dough.
  • Wet the blade in water between slices (especially when working with sticky dough).
  • If you want to create an “ear,” the knife blade should be held at a shallow angle (about 30 degrees) with the surface of the loaf, about 0.6 cm/ ¼ inch deep.
  • Practise, practise, practise, bake, bake , bake, score, score score!

Baking times:

What I was told at the workshop :  slide the bread onto your baking stone and bake in the oven at 500 °F / 260 °C for the first 10-15 minutes, then turn the oven down to 420 °F / 215°C for a further 30-35 minutes (45 minutes in total)

What I found using my oven:  bake in the oven at 550 °F / 287 °C for 10 minutes, then turn oven down to 420 °F / 215°C for 40 minutes. A little variation from the above method, but I found that my bread wasn't cooking through, so  I decided to try baking the bread at a hotter temp and for a longer total time and it worked great! Every oven is different. You will find the best timings for your oven through trial and error. 

You should be able to tell if the bread is done by turning it over and hearing a hollow sound when you tap it. Bread not cooked? Put it back in for longer!

Sourdough-9.jpg
Sourdough-13.jpg

Taking Care of your Starter / New Found Pet

As mentioned above, your starter is alive. It is constantly feeding from the live yeast and good bacteria found in the air. So, to keep it living, you need to properly take care of it and feed it.

First of all, store your starter in a glass jar. Never put your starter in a metal container, nor should you ever use metal spoons to stir it up. Wooden spoons are preferable.

Feeding your starter:

Your starter is fed using water, all purpose and whole wheat flour. Stone ground, organic flour is always best.

To feed, you need to first tip out the majority of your starter. You can use this excess starter for other recipes such as pizza or pancakes, give it to friends, or throw it away. You can adjust the amount of starter you keep depending on how much you are going to use. Here is the basic ratio (can be increased to suit):

1 tbs of starter.
4tbs water
2tbs all purpose flour
2tbs whole wheat flour

Stir all ingredients to combine. Make sure there is room left at the top of your jar - your starter will grow!

There are two ways to store your starter, on your bench top, or in the fridge.

Storing on the bench top (best, most traditional way):

Keep your starter on your bench top and cover it with some cheesecloth and a rubber band. Don't seal it, it needs oxygen to grow.

If storing your starter on the bench top, you will need to feed it every second day.

Before using, you will need to refresh your starter 12 hours before by feeding it twice. Eg. Feed at 7am. Feed at 3pm. Use at 7pm. This is approximate and can be played with a little.

Storing in the fridge (a little more practical for at home bakers):

It is possible to store your starter in the fridge. Do seal it, you don't want it to soak up all of the nasty flavours of the fridge, plus, it will go into hibernation mode so it won't need as much oxygen to stay alive.

If storing in the fridge, you will need to feed it once a week. Before using your starter, you will have to  feed it three times at least 16 hours before you use it, to make sure that it is fully active. Eg. Take it out of the fridge and feed at 7am. Leave on the bench top overnight. Feed again at 7am. Again at 3pm and it will be ready to use at 7pm. Again, this is approximate and can be played with a little.

When left in between feeding, you starter may develop a layer of  liquid on top. This is called hooch and is just alcohol from the fermenting yeast. You can either stir it in or tip it out. I tip it out. As long as your starter isn't green or any other colour (bad bacteria), you are good to go!

Going out of town? Increase the amount of flour when you feed your starter to make the mixture more doughy. This will give you starter more to munch on while you are away.

Sourdough-12.jpg
Sourdough-14.jpg

So. There are the secrets. You now have in front of you everything I have been taught and everything that I know about making Sourdough. You're welcome. It's long. It's complicated. It is just as much art as it is science. I'm not an expert. Just a little passionate and in love with sharing. I still have a lot of time left in the kitchen perfecting all that is above - but so far, I love every flour covered, stone cracking, strange looking loaf moment. It does become addictive. Strangely addictive. And so, so, very rewarding. You will now often find me Sunday night soup dipping and Monday night bruschetta eating. Any excuse to eat this flavourful, robust, healthy and hand made bread. And then there is Frankel. Feeding Frankel is still an exciting part of my day. I'm going to do everything in my power not to kill him. I couldn't possibly. I am now spoiled with home made Sourdough - and I'm not sure that I can ever go back. Tea and toast has never tasted so good.

July 18, 2014 /lean timms
Food
1 Comment
Blackberry-Almond-Cardamom-Iceblocks-15.jpg

Blackberry Almond + Cardamom Iceblocks

July 10, 2014 by lean timms in Food

Last week my friend and I journeyed up to Harriet's Bluff in Georgia once again to forage for some fruit. This time, we picked blackberries. Gerard the owner was there again, gleefully greeting us and riding around on his tractor. It was hot. So very, very hot. We lasted only an hour, but managed to fill up two large containers worth of berries. We were picking at high speed. Super berry pickers.

Blackberry-Almond-Cardamom-Iceblocks-2.jpg
Blackberry-Almond-Cardamom-Iceblocks-1.jpg

Maybe it was the heat that prompted me to turn these tart little berries into iceblocks. Iceblocks. It's what we call them back home. You may very well know them to be popsicles, but today I have decided to stick with the much more literal and my native tongue version of the kind.

I hadn't experimented with matching flavours with blackberries before. Their tartness never really hooked me in the way that other sweeter berries would. So mostly, I would just pair them with their other berry friends on top of yogurt, in smoothies or simply just on their own. However, for this recipe I was searching for something special. It just so happened that I had been yearning to find the perfect excuse to use one of my favourite spices of all the spices out there - the lovely little seed pod that is Cardamom. My first introduction to this spice was made during my time living in Sweden. There was a flavour that kept sneaking into my busicuits, buns and tea. I didn't recognise it and so I just assumed that it was a special exotic ingredient that would keep popping up as it may, and that I would have to just savour whenever I could. It wasn't until I really became interested in cooking Swedish food and breaking down the ingredients in recipes that I learnt what Cardamom was. Now, I can't get enough. Swedish pepparkakor will always be my favourite place to add it.

Blackberry-Almond-Cardamom-Iceblocks-3.jpg
Blackberry-Almond-Cardamom-Iceblocks-6.jpg

These iceblocks turned out to be quite the fun summer experiment. Blackberries met cardamom who met almond milk. The almond milk was an afterthought, and it was an afterthought that I was glad to have had. Cardamom loves creamy flavour and texture, so the final addition of almond milk seemed perfect. I enjoyed the flavour combination result - sweet yet still a little tart, while being creamy and a little exotic - Scandinavian type exotic I suppose. If you ever have a go at making them, I would love to know your thoughts. I'd like to think that I have made a bold iceblock hit. But, it is still very possible that I should very well leave the cardamom in it's safe and suited place of a plate of Swedish pepparkakor... please, let me know.

Blackberry-Almond-Cardamom-Iceblocks-13.jpg
Blackberry-Almond-Cardamom-Iceblocks-4.jpg

Blackberry Almond + Cardamom Iceblocks

prep time: 1 hour
cook time: 15 minutes
set time: 2 hours
total time: 3 hours 15 minutes
yields: approx 8 medium iceblocks

1 1/2 cups fresh blackberries
1/4 cup plus 2 tablespoons sugar
600mls / 2 1/2 cups unsweetened almond milk
6-8 cardamom pods, lightly crushed 

Place the almond milk, 2 tablespoons of sugar and cardamom pods in a saucepan over high heat. Just before the milk comes to a boil, remove the saucepan from the heat, allow to cool down and place in the fridge to infuse overnight, or at least an hour. Place the berries into a medium saucepan with about 2 tablespoons of water.  Be careful not to cook the berries - the heat is only to help the berries release their juice. Use a potato masher to crush the juice out as they heat. Once the berries are mostly crushed and all of the juice is released, pour into a fine strainer over a bowl. Press the berries to extract as much juice as possible until all you are left with is pulp. Save the pulp for a rainy day (or throw away), you only need the juice. Place the juice back in the saucepan, add 1/4 cup of sugar and heat the syrup mixture over medium heat until all the sugar has dissolved. Evenly pour the berry syrup into each popsicle mold. This should fill up to 1/3 of each mold. Put in your iceblock sticks and set in the freezer for about 2 hours, or until firm. Once set, pour the almond cardamom milk to fill up each mould, leaving a little room at the top for the liquid to expand. Place in the freezer once again for another couple of hours until firm.

July 10, 2014 /lean timms
Food
Comment
  • Newer
  • Older

  • Farms (12)
  • Gatherings (21)
  • Creative Humans (29)
  • Travel (46)
  • Food (62)
SBS Featured Badge.png
             

© 2017 Lean Timms. All Rights Reserved.